7 Tips for Choosing the Right Solar PV Cable?

Choosing the right solar pv cable is not a minor purchasing decision. It affects safety, energy yield, maintenance costs, and the service life of the entire photovoltaic system. A cable may look durable on a showroom shelf, yet fail early under ultraviolet radiation, rooftop heat, moisture, or repeated thermal expansion.

Solar PV specialist John Wiles often emphasized a practical principle: “Good design is not enough; workmanship matters.” That lesson applies directly to cable selection. Installers must examine conductor size, insulation quality, voltage rating, temperature resistance, bend radius, and connector compatibility. A cable running beside a hot metal roof faces different stresses from one installed beneath a shaded module. Small details matter.

These seven tips focus on decisions that are easy to overlook. They consider electrical performance, environmental exposure, installation conditions, and long-term reliability. For example, undersized conductors can increase voltage drop and create unnecessary heat. Poorly matched connectors may invite moisture, even when the cable itself meets the required standard. The cheapest option is not always the economical one.

There is no perfect checklist.

Real projects include awkward roof layouts, uncertain cable routes, and changing weather conditions. That means specifications should be verified against the actual installation, not copied from a previous project. A careful choice combines manufacturer data, recognized testing, qualified installation, and honest risk assessment. The goal is simple: select a solar pv cable that remains dependable when the panels are producing power at their hottest and most demanding moment.
7 Tips for Choosing the Right Solar PV Cable?

Understanding Solar PV Cable Types and Their Roles

7 Tips for Choosing the Right Solar PV Cable?

Understanding Solar PV Cable Types and Their Roles

Solar PV cables carry direct current from modules to combiner boxes, inverters, and protection equipment. Module cables usually connect panels, while string cables join several modules together. AC cables then carry converted power from the inverter to the distribution system. Each cable has a different role, so treating them as interchangeable can create avoidable risks.

Match the cable’s voltage and current rating to the system design, including expected temperature effects. Select insulation made for outdoor exposure, ultraviolet radiation, moisture, and repeated heating and cooling. Look for suitable conductor size, because excessive voltage drop wastes energy and increases heating. Copper offers strong conductivity, while aluminum may reduce weight but needs careful termination. Check the cable’s temperature rating and installation environment. Roof spaces can become extremely hot.

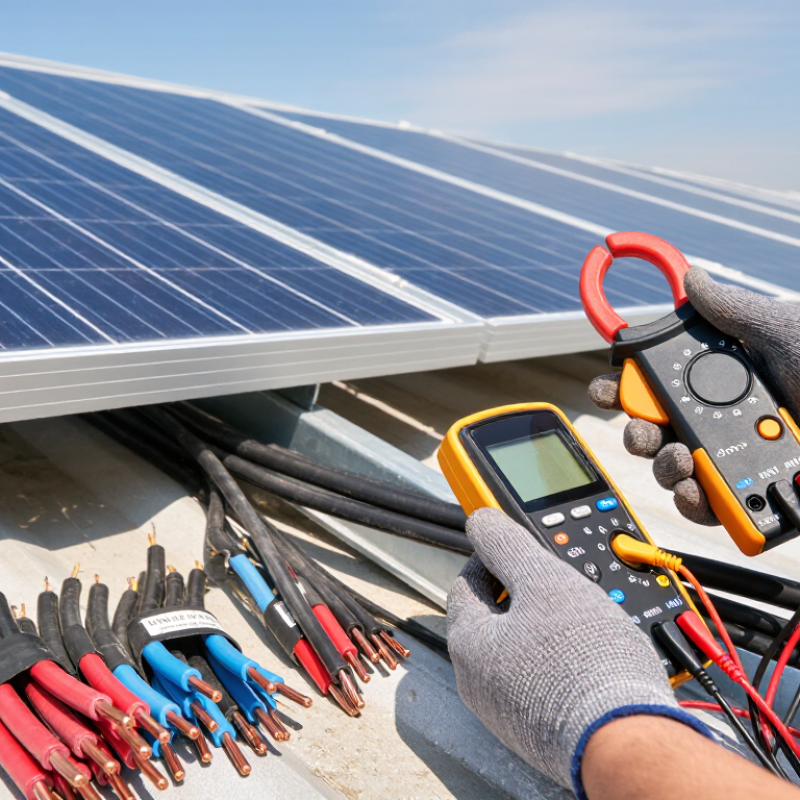
Use compatible connectors and maintain proper polarity during installation. A loose connection may appear acceptable during testing, then heat under full load. Route cables away from sharp edges, standing water, and areas where wind can cause abrasion. Secure them without crushing the insulation. Follow applicable electrical codes and verified testing standards. Real sites are messier than drawings. I have seen tidy cable runs fail because drainage was ignored. Cable identification also matters during maintenance, especially when multiple strings look identical. Keep records of cable sizes, routes, test results, and any field changes. A technically correct cable can still perform poorly when installed carelessly.

Matching Cable Size to Current, Voltage, and System Distance

7 Tips for Choosing the Right Solar PV Cable?

Matching Cable Size to Current, Voltage, and System Distance

Cable selection begins with the array’s maximum operating current, not its average output. Use the design current, then apply the required safety factors from local electrical codes. A cable that seems adequate on a cool morning may overheat inside a crowded conduit. Check conductor ampacity after considering sunlight, ambient temperature, installation method, and cable grouping.

Voltage drop becomes more important as the distance grows. Measure the complete circuit length, from the array to the inverter and back. For example, a 30-meter route represents about 60 meters of DC conductor length. Use a voltage-drop calculation based on current, resistance, and cable length. A larger conductor may cost more, but it can preserve useful voltage and reduce conversion losses. Keep the calculation practical.

Do not select size by current alone. Confirm the cable’s rated system voltage, insulation temperature, flexibility, and resistance to ultraviolet exposure. Connectors must also match the conductor size and installation environment. Some designs pass a simple ampacity check but perform poorly after long cable runs. That mistake is easy to repeat. Recheck the design under high irradiance, hot roof conditions, and future expansion. When calculations conflict, have a qualified electrician verify the final selection against applicable standards.

Choosing Suitable Insulation, Temperature, and Weather Resistance

Choosing the right solar PV cable starts with its insulation. Use cable designed for direct-current photovoltaic service, not ordinary building wire.

Look for insulation that resists ultraviolet radiation, ozone, moisture, and mechanical abrasion. Cross-linked materials usually tolerate rooftop conditions better than basic plastics. Check the technical sheet carefully. A thick jacket alone proves little.

Tip one: confirm the cable’s rated voltage matches the array and inverter.

Tip two: select insulation with documented UV and ozone resistance.

Cheap protection can become brittle.

Temperature deserves equal attention. Measure the hottest cable location, especially beneath dark modules or inside a crowded conduit.

Cable ratings often show maximum conductor temperature, ambient temperature, and installation limits. Do not compare these numbers casually.

Tip three: allow for local heat, not only the weather forecast.

Tip four: check the minimum winter temperature for flexibility.

Tip five: use correction factors when several cables share a conduit.

In field inspections, loose routing and sharp bends often create avoidable stress. I have seen tidy-looking arrays fail early because installers ignored heat buildup.

That experience remains a useful warning.

Weather resistance also includes water, wind, hail, and repeated expansion.

Tip six: choose connectors and cable jackets with compatible sealing requirements. A cable may resist rain yet fail when water travels along a poorly sealed connector.

Tip seven: secure exposed runs, maintain bend radius, and keep cables away from standing water.

Inspect unused cable ends before energizing the system. Small cracks matter.

Record the selected cable rating, installation temperature, and inspection date. This record supports maintenance, although it cannot replace careful workmanship. Some site conditions remain uncertain. Recheck them before purchase.

Checking Safety Standards, Connectors, and Installation Compatibility

Choosing a solar PV cable is a safety decision, not merely a purchasing decision. IEA PVPS reported 456 GW of new photovoltaic capacity in 2023, bringing global capacity above 1.6 TW. That scale makes small installation errors more consequential.

Check IEC 62930, EN 50618, or UL 4703 markings before comparing prices. Confirm rated voltage, temperature range, flame performance, UV resistance, and conductor size. A 1,500-volt string needs cable rated for the same DC environment. Do not trust appearance. A cable may look identical while failing a required test.

Connectors deserve equal attention. IEC 62548 emphasizes correct connector selection and secure assembly. Never mate visually similar connectors without verified compatibility. Use the specified crimp tool, then inspect the crimp barrel and locking tab. NREL’s photovoltaic operations guidance also stresses regular checks for loose connections, damaged insulation, and poor cable management. An IP rating helps only when the connector is fully locked and sealed.

Installation compatibility is practical. Measure the cable route, bending radius, conduit space, and expected thermal movement. Keep cables away from sharp metal edges and standing water. Secure them without crushing the insulation. I have seen tidy cable runs hide excessive tension near the connector. That detail is easy to miss. Recheck it before energizing the system.

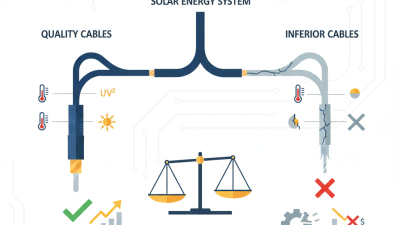
Comparing Cable Quality, Durability, and Long-Term Value

7 Tips for Choosing the Right Solar PV Cable

Comparing Cable Quality, Durability, and Long-Term Value

Tip 1: Check the conductor material and cross-sectional area. High-purity copper usually carries current efficiently and reduces voltage loss. A thinner cable may cost less, but it can heat more under continuous loads.

Tip 2: Examine the insulation carefully. It should resist sunlight, ozone, heat, moisture, and mechanical stress. Look for recognized safety testing and clear technical documentation.

Tip 3: Match the cable to the installation environment. Roofs can become extremely hot, while ground-mounted systems face rain, mud, insects, and accidental impact.

Tip 4: Consider flexibility and bending limits. A stiff cable may crack when forced around a sharp frame edge. Small details matter.

Tip 5: Inspect connector compatibility and contact quality. Poor connections create resistance, heat, and avoidable maintenance problems.

Tip 6: Compare lifetime value, not only purchase price. A durable cable can reduce energy losses, replacements, and inspection labor over many years. However, expensive does not always mean better. Review test results, temperature ratings, warranty terms, and installation guidance.

Tip 7: Plan for inspection access. Cables hidden under panels are easy to forget, which is an imperfect habit during rushed projects.

A practical mistake is choosing cable size from current alone. Cable length, ambient temperature, grouping, and installation method also affect performance. An experienced installer checks these factors before ordering materials. That extra calculation may seem slow, yet it can prevent early insulation damage and disappointing system output.